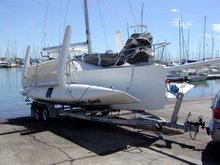
 I'm now working on both floats. When one is curing up I can do work on the other. My plan is to laminate the outer layer this easter. ( Yes, I got a 10 days holiday.) So to do this I need to fair the outside.
I am a little in doubt here, since some of my foam is scallop which means that a single sheet of foam hollows from edge to edge as much as 2-3 mm. This has to to with hot forming foam. I found in the end of the process that each piece of foam has a curved shape so by placing this to the outside and heating from both sides some of the scallop can be overcome. I could fill this before i laminate or after, or both. So I settle on the latter, bought a 50 m roll of good quality 40 grit sanding paper, and made up a 1 m longboard from 6 mm plywood.
Also bought 10x 0.3 kg of microballons as this disappears fast from the stores, so I hope I got enough of this expensive stuff.

I then faired one side of a float to see how it worked. Use a thin batten to see if hull is fair. After filling lows i sanded with longboard for about one hour, then sanded all with the orbit sander with my vacuum cleaner attached. I just worry to fill to much as it adds weight but I do need to fair the hull some way or another. Maybe I sand the foam more roughly before filling next half.
 Tips: When filling with bog (here, microballons and epoxy) I found that the bog gets more and more dry as you work it on and of the foam, this is because the epoxy gets squeezed out. So i just have a little cup with some fresh epoxy, I add a squirt and mix with the remains. This way the consistency remains the same. To dry bog is very hard to work with: it rolls of the foam and is almost impossible to level with the trowel. I use 3 sorts of filling knifes/trowels, a small for use in the bucket and two wider ones for spreading.
 I use a router to fit high density foam. I think this is a easier way than doing it while still in foam frames.
 I close all holes to make vacuum bagging more easy, except the big hatch which is already glassed. The bag will seal around the edge of this. Also stern and bow is now closed. I fit a bumper to the bow later so hull is kept watertight if a front collision should appear.
 I close the bow with a pregassed sheet ( a cutof from a hatch). Later a bumber piece well form the bowprofile.
  End of this fine day. I start now to take a shot from this corner to see the how things change from a bigger perspective. The grey stuff on the nearest float is S-fill a twopart epoxy filler ready to mix and apply. I bought it for fairing outside after glassing so this is just a test to see how it is to apply and sand. Very easy to apply, easier than my homemade filler.


