Sunday, January 25, 2009

Lower port hull planked and HD inserts

The planking of the lower hull is now ready to fit HD inserts , short for high density ( hard foam 200 kg/m3). These pieces are used everywhere compression will occur, like fitting locations, but also along keel for trailering loads.
First I had to fit another batten on top to hold the extra foam, needed for vacuumtape.

Here I marked the two cutting lines for the keel HD, with this simple guide.

Cutting the foam out using a Fein cutter (this machine, I borrowed from a friend, is very usefull in a project like this)
Test fitting the HD strip.

Tuesday, January 20, 2009

Fitting foam on mainhull

Jess has been helping me before and I asked him to help fit the foam since when you are two persons, it is a lot easier and no screws on the inside is needed. As with the floats I cut the foam in 40 cm strips and route a shiplap each side (see feb. 2007 for detail). From frame 4 and forward we went to 30 cm strips since the bend is sharper at the keel.
We fasten a new strip in the middle and start hotforming the bottom part first (actualy it is the top but on the picture it looks like down!!!). As Jess is moving the heatgun I apply pressure and try to overbend it since it tends to springback a little. Proper heating is very importent since the holding power of the screws are poor. The strip has to be shaped to lay close to the battens as possible.


I
Foam is screwed from the outside. Jess is pressing the foam down as we go. Some places needs two or more screws to hold the foam.

Setting up frames

The frames was cut from fullsize drawings and set at 60 cm distance on the frame. Here from the stern. The frames are cut 18 mm larger than the hulskin itself to add for the battens.

Seen from the rear.

Fitting battens

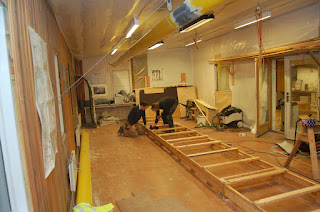
Setting up building base...again.


I had to set up the base again for the mainhull. I asked Thomas and Hjalte (his son who took the pictures) to come and help since Thomas got a rotating laser level ( makes a red level line all around). It was a great help and good to know that the base is level and fair.

A little tobacco while evaluating the job.

The round "Arto Dito" on the orange box is the laser level. Now Thomas can check that the red light hits the same number on the ruler on all points on the frame. If not we put thin plywood shims under the frame.

Thomas cuts shims from a plywood left over.....in a not to safe way if you ask me. Maybe I need to tell him......

"Thomas you better cut the damn plywood without cutting yourself...."

"Are you talking to me...punk ?? "
"You damn right, no cut off fingers on this floor, I just wiped it clean."
"Yeah right..when is the food ready by the way?"

"When you are finished you can eat, do you think this is Buena Vista Social Club."

Almost done, frame are screwed to the floor.

"Done, let's eat ...."

Beams

The beams are made in a mold with a top added after all the interior part are done. The process are foam inside, covered with layers of uni and 45/45 carbon ( I choosed carbon since I want my beams to be as strong and stiff as possible. Next bulkheads and webs are added. Now I am waiting for the last fitting to be finished so I can start fitting the struts. More on this later.

Mold with foam

Topplate with Uni and 45/45 carbon and a 0/90 on top.


This messy picture are 2 of 8 coverplates for the Upper folding strut bolts.

The plate in a wise for a closer look. They will be cut smaller later.